When building your app on Bubble, it's a common use-case to have some data record that you need to display in different places.
Let's take the user profile as an example, which has fields like the first name, second name, email, phone, address, etc. A typical app might need to display this profile info on the following screens:
- My profile section (for users to view/edit their own profile).
- User profile (public or admin-only view).
- Add user screen/popup.
- Edit user screen/popup.
An obvious (ineffective) solution would be just to copy-paste these UI elements and workflows, customizing them where needed.
Even though it will work, there will be a lot of repeating elements and workflow; such an app will be tremendously hard to maintain/update and prone to errors and inconsistencies.
This article will show how to use powerful Bubble features such as reusable elements and passing data to the popups. And you'll cover all 4 of the use cases above with just one component!
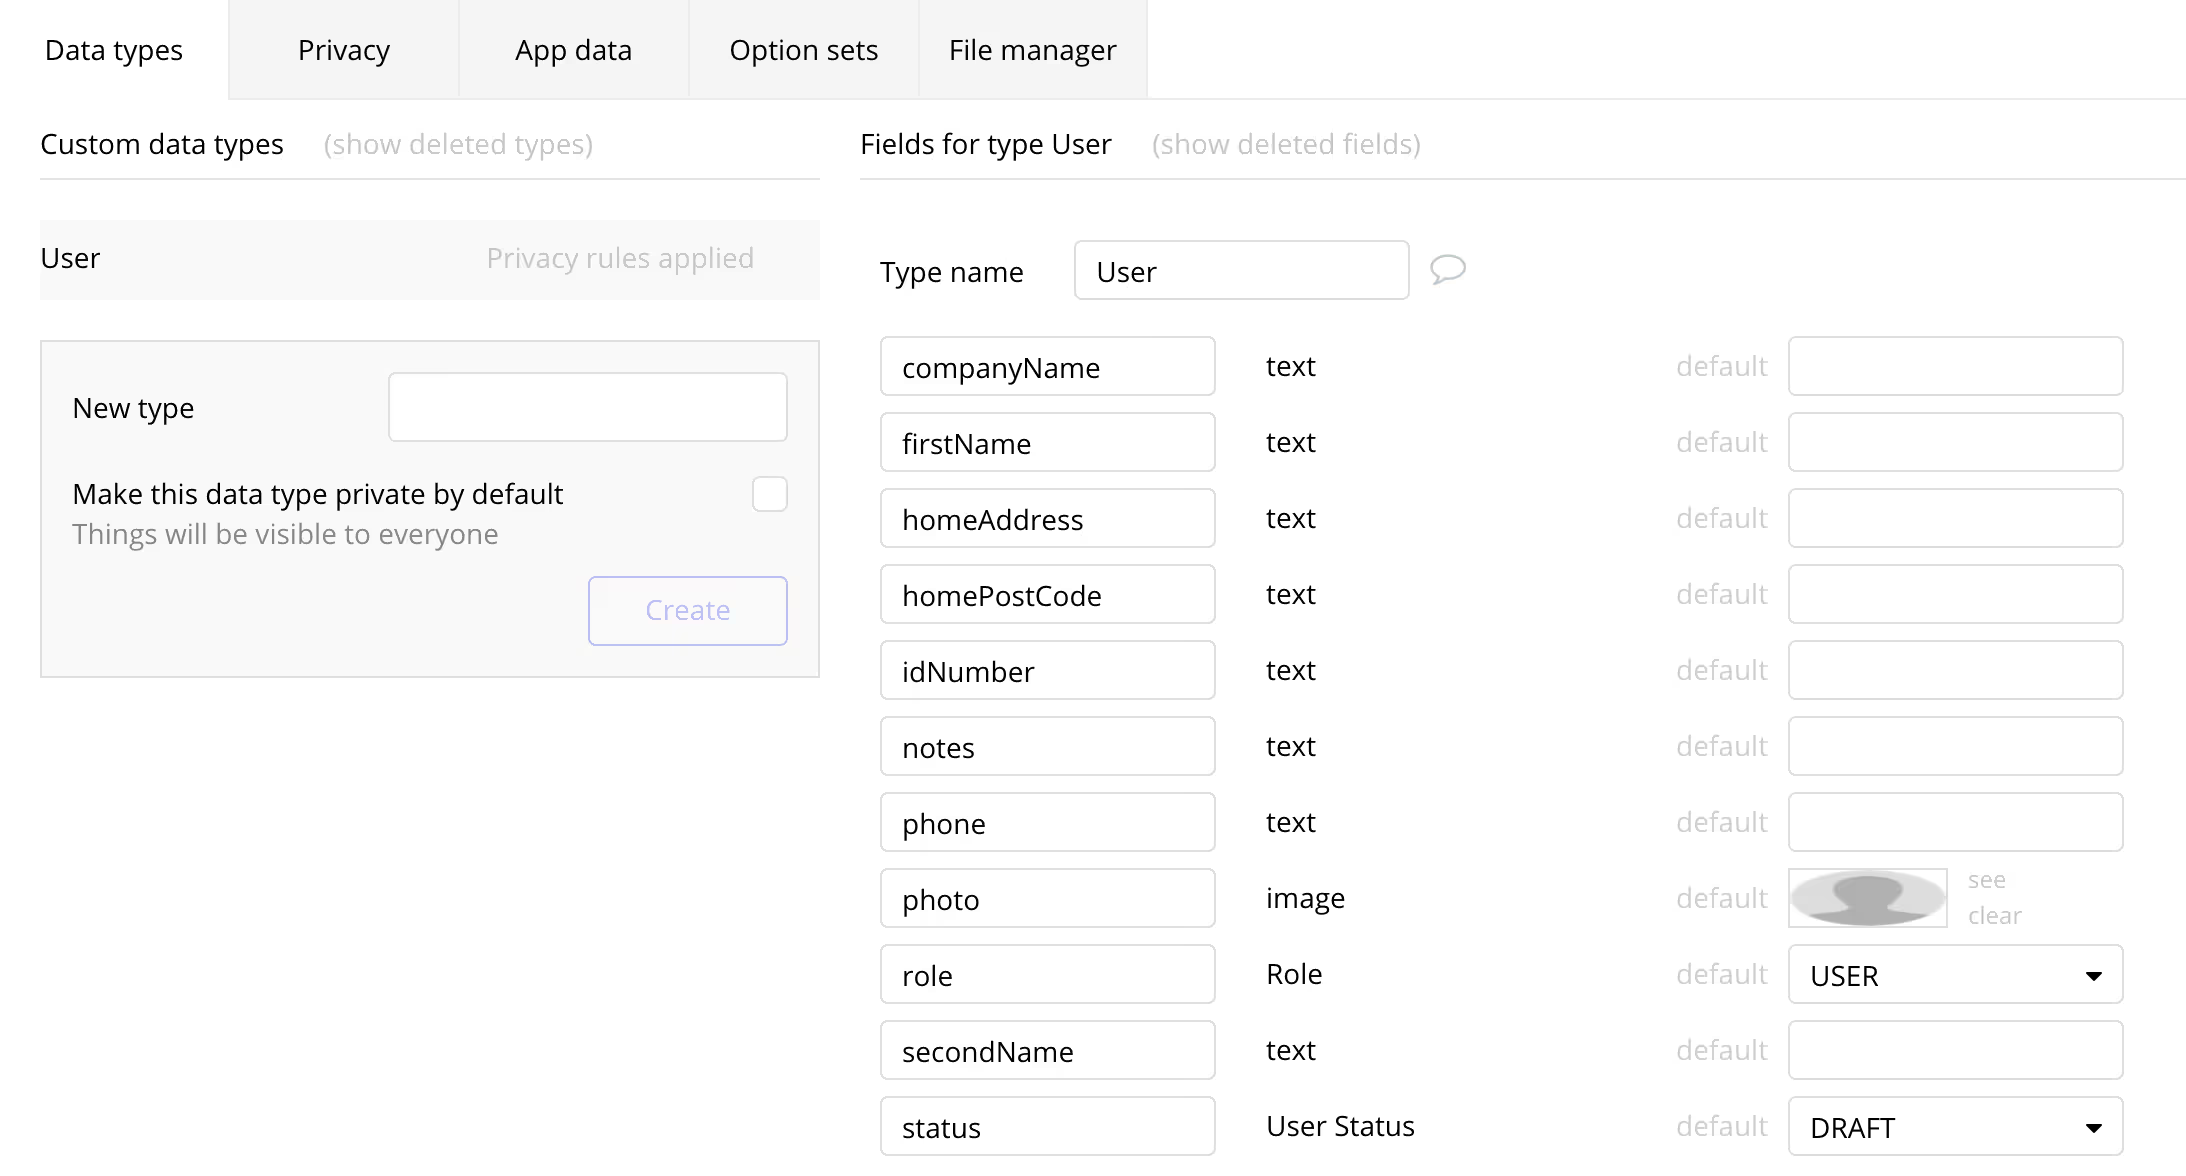
App setup and data
To demonstrate what we're building, we've created a simple app example here that you can test here. The app has a few simple screens:
- Landing
- Login / Signup
- Home screen
- My profile
- Users (Admin-only view)
The app has just one (default) data type — "User" with a few typical fields.
Reusable element "User profile view"
Let's start by creating a reusable element, "User profile view" (Bubble docs). Its type of element should be "Group", and the type of content — "User". This is important since we'll be able to pass the data of this type to this group only if the type of content is set.
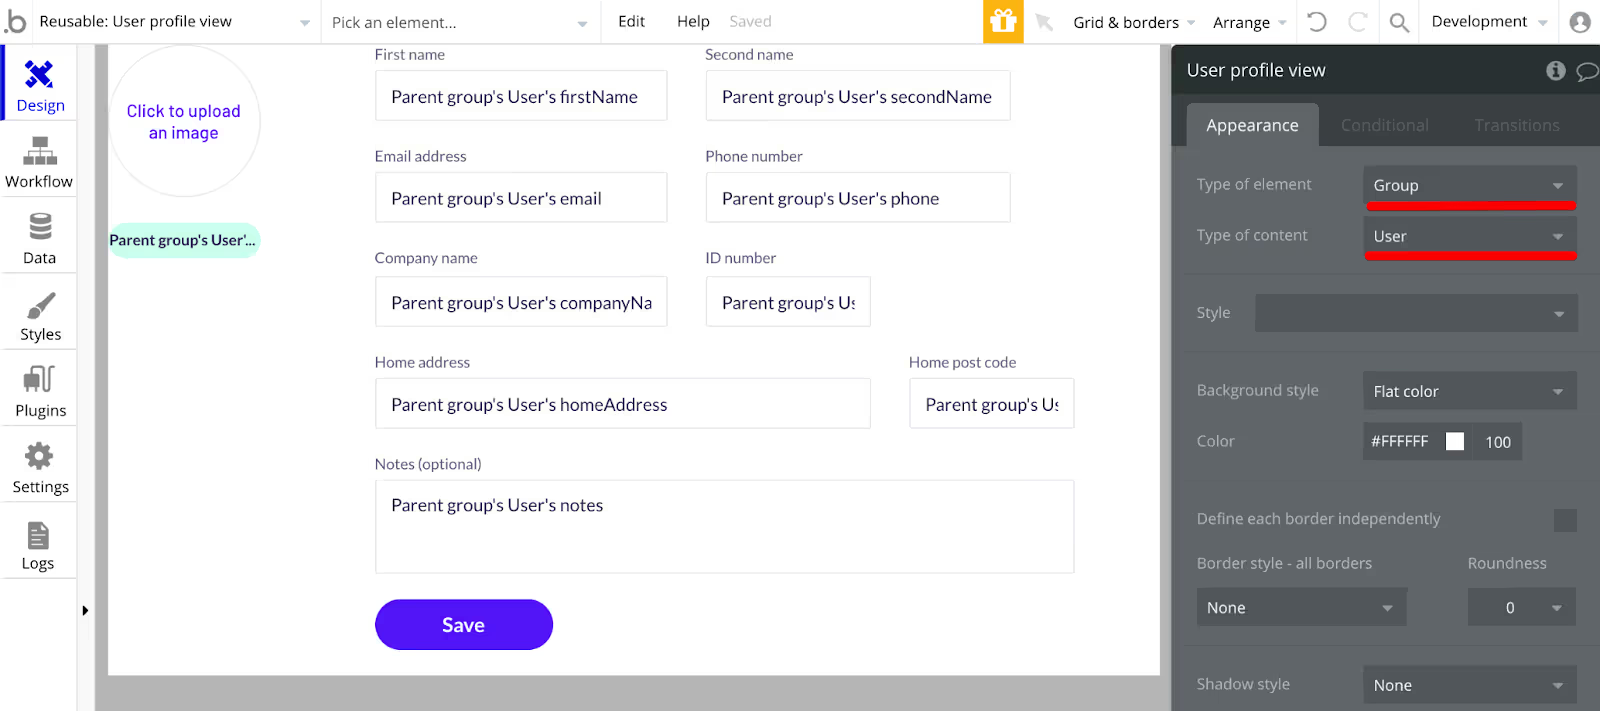
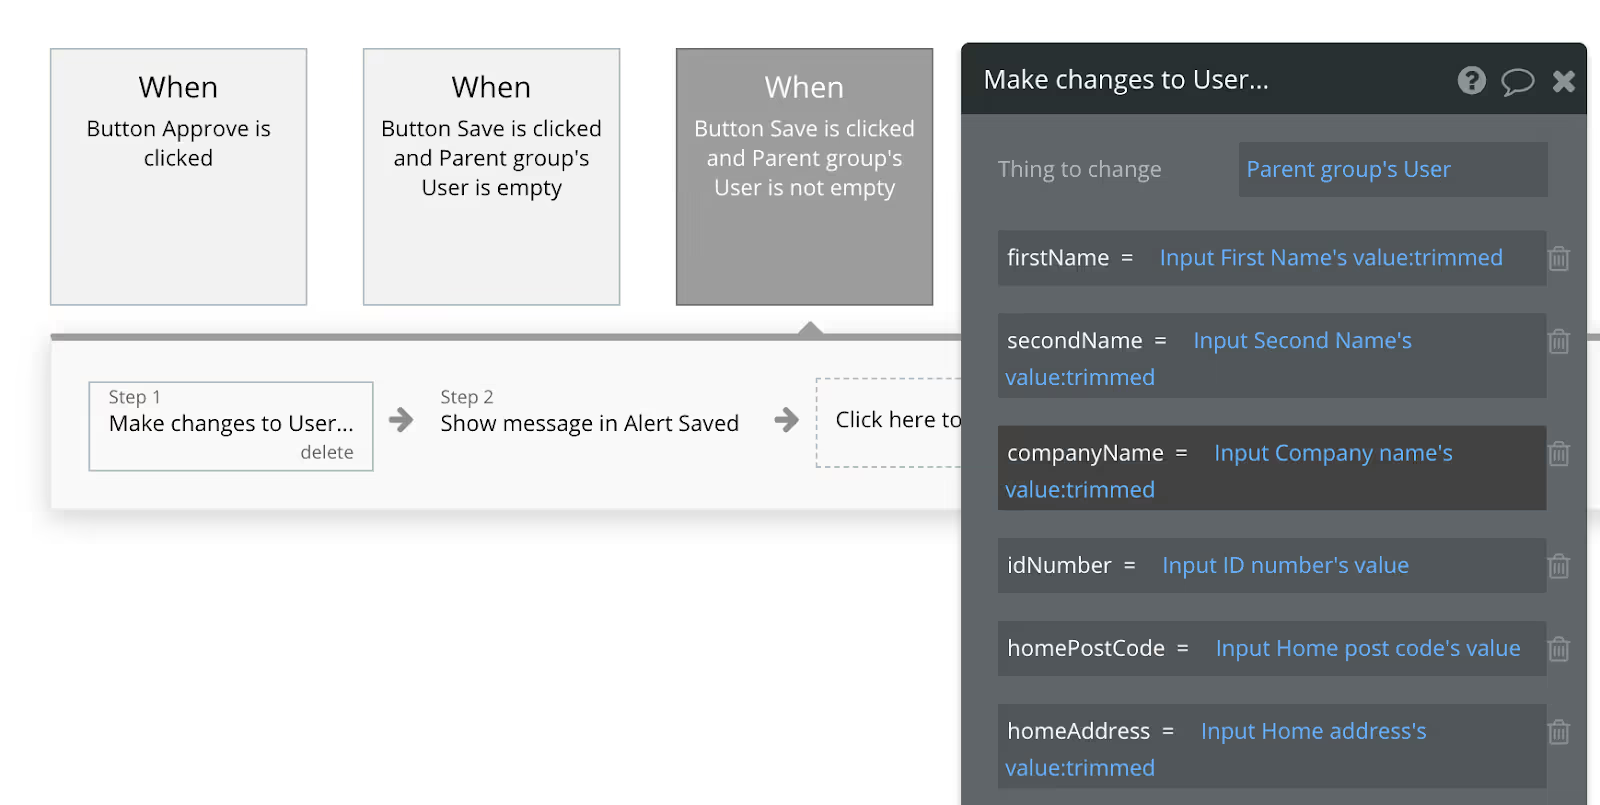
For the click on the "Save" button, we'll just add a workflow action "Make changes to a thing", and save all the input fields to the respective fields of the User model.
My profile screen
Now, let's create a "My profile" screen, in which we'll place our reusable element "User profile view" (at the bottom of the left menu), and pass "Current user" as the "Data source".
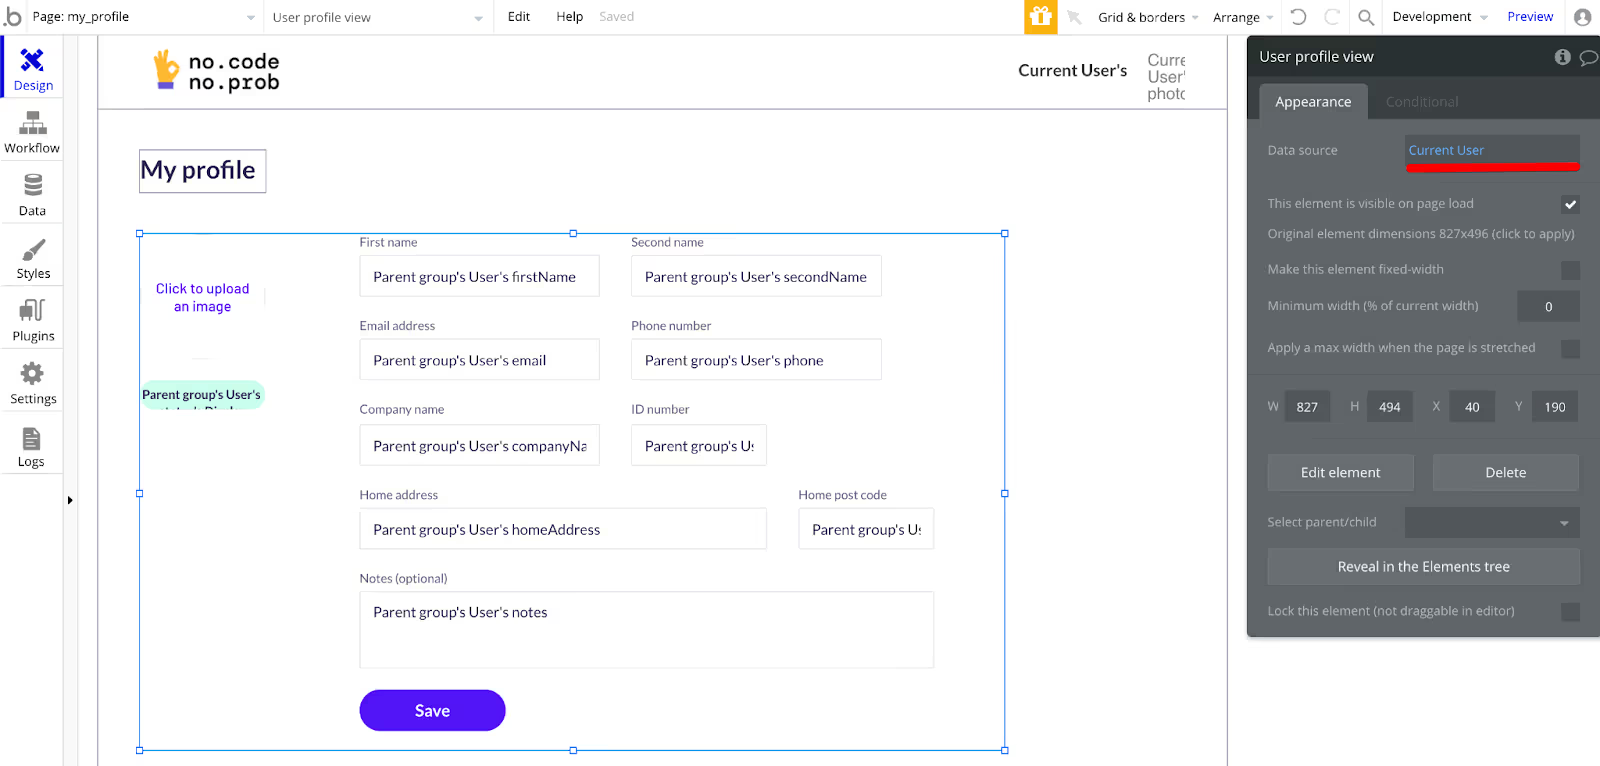
And that's it; we already reused our element.
User profile
Let's also create a User profile screen (with the type of content "User"), where we'll display the information of a specific user. Such screens can be public or admin-only. In our case, it's an admin-only screen, so all the details should also be editable.
As a data source, we'll pass "Curren Page User".
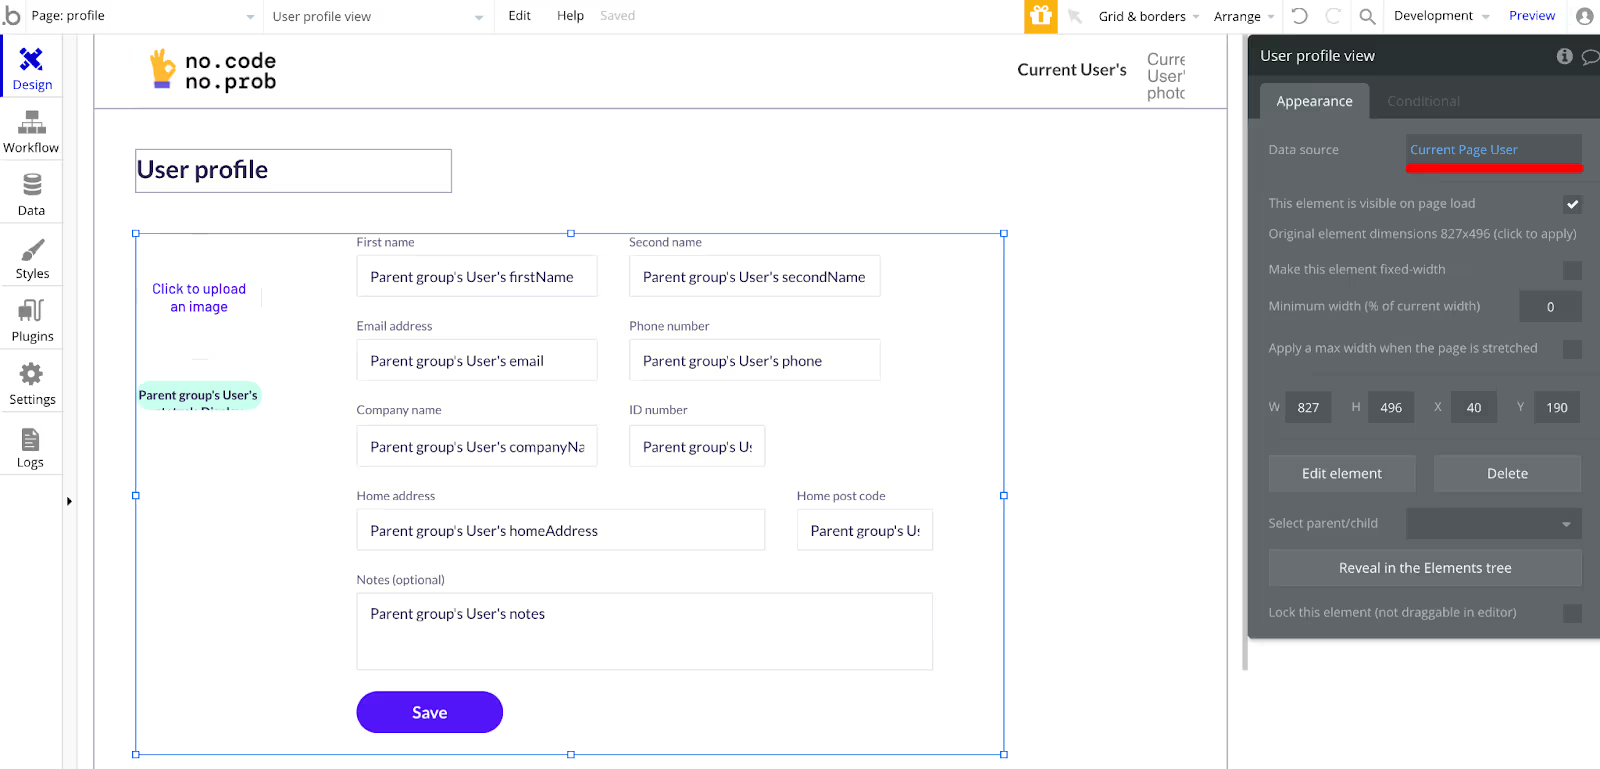
As an extra button, we'll add "Delete user" button and extend our reusable element with the dropdown that would change the user's status. We'll also "auto-bind" it to the user's "status" field.
Congratulations, we've re-used the element again!
Add/Edit user popup
Let's create an admin-only screen "Users", where admins can search/view users and change their status or details.
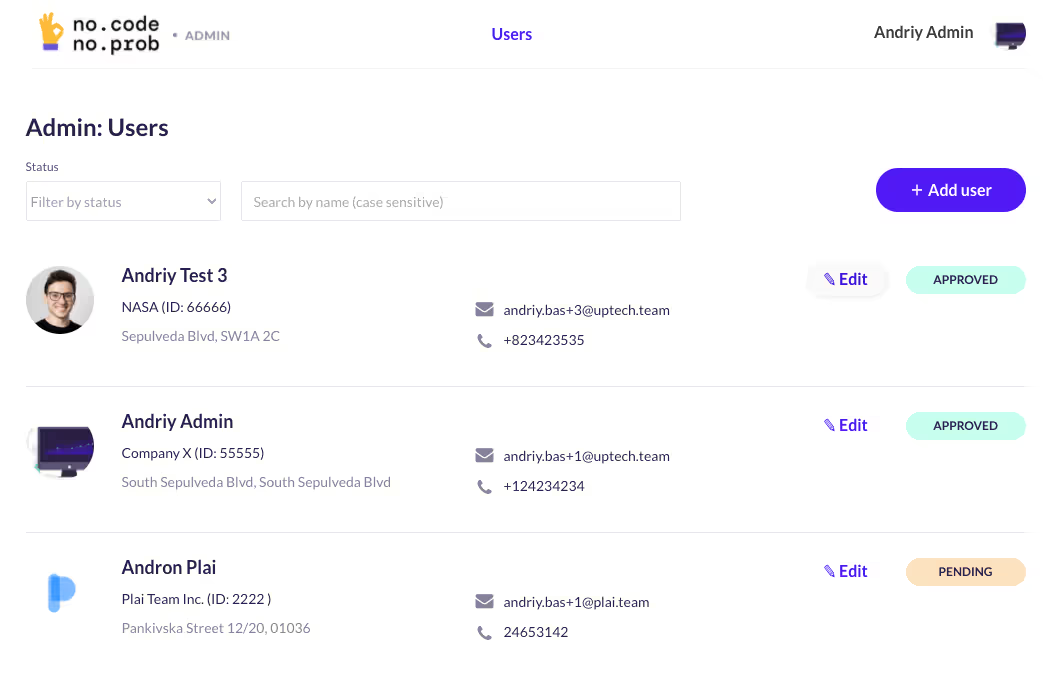
We'll also want to have a quick way to open the "Edit user" popup right there from the list, to save time for admins making changes to the users.
To implement it, let's create a new reusable element, this time of the type of element "Popup", and the type of data — "User". At the center of the popup we'll put the same "User profile view" element and pass "Parent group's User" as a data source to it.
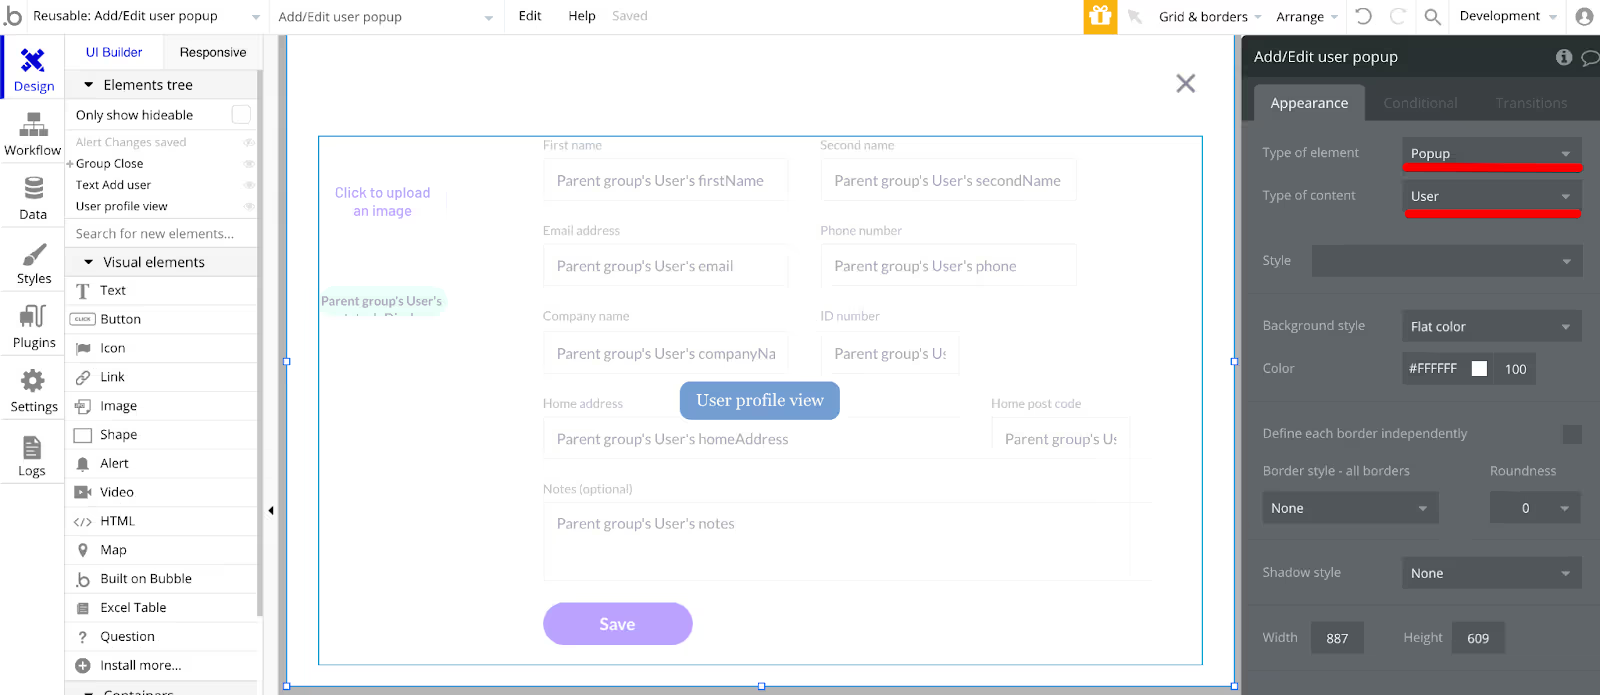
However, we'd need to handle two use-cases here:
- Add user (all fields are empty) with the "Add" button.
- Edit user (fields with the user data) with the "Save" button.
To handle these 2 cases, we'll need to add a couple of conditions and compare if "Parent group's User is not empty". If it's empty, we'll change the title and the button to "Add user" and "Add" respectively.
We'll add a condition to check if the parent group's user is empty on the click on the button. If it's empty, we'll perform the action "Create an account for someone else", and save all the respective fields for the user.

* Note: usually, you'll use the "Create a new thing" action here. But because the "User" data type is special in Bubble, we need to use a particular action to create this data type.
Then we'll add the workflow on the "Edit" button to "Display data in Add/Edit user popup", and then "Show" this popup (for "Add" button — to reset the data and show this popup).
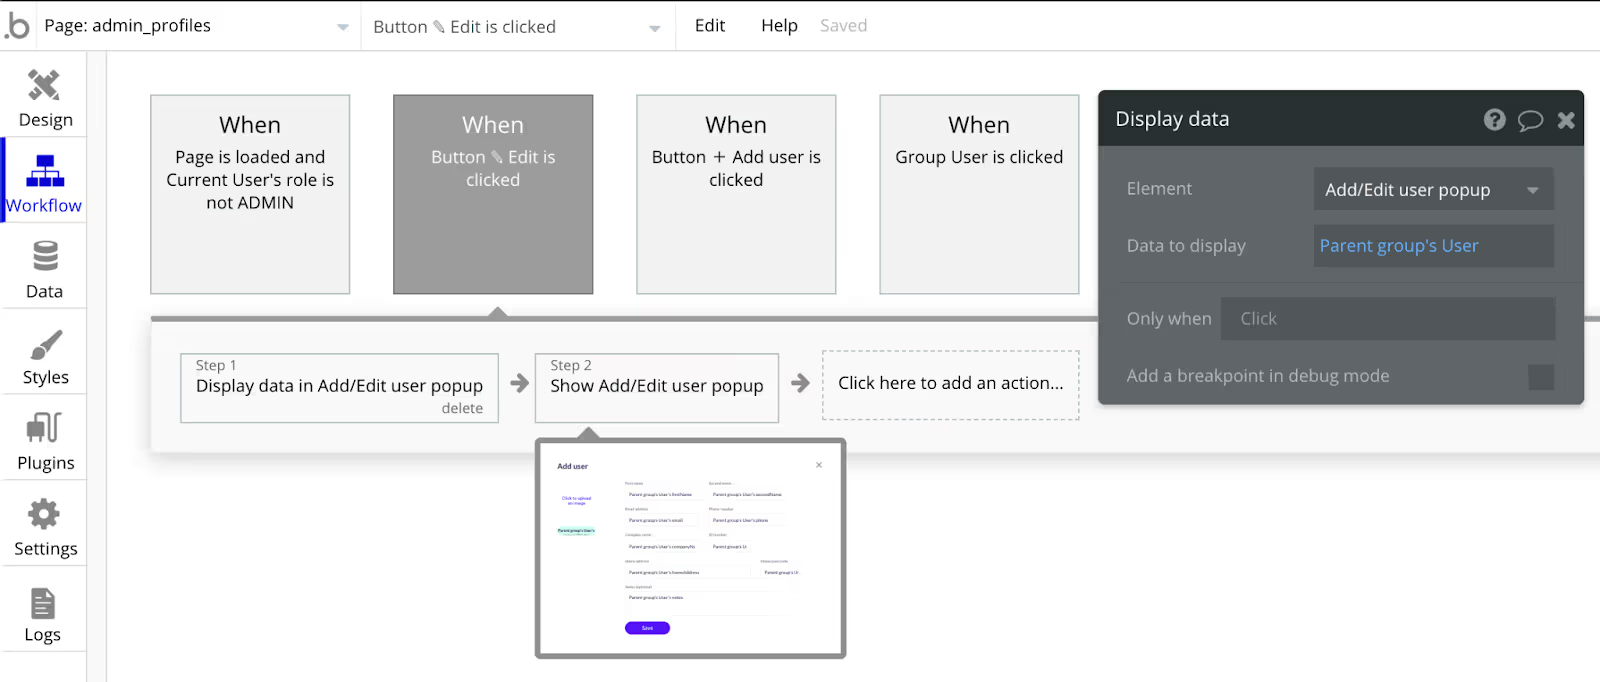
You can customize the view according to different conditions (like user status, currently logged-in user role, page, etc.), to match your unique app requirements.
Summary
By using Bubbles features such as reusable group and passing data to popups we could reuse the same component in 4 different places, thus significantly reducing the need to duplicate the code and workflows.
Check out this video to view the detailed walkthrough of the app and all the features:
The link to the test app: https://popup-edit-records-demo.bubbleapps.io/version-test/
Admin credentials: andriy.bas+1@uptech.team / qwerty
If you need any help building functional apps with great UX and UI on no-code, don't hesitate to contact us.


.avif)


